iOS Core Image Tutorial
- What is Core Image?
- Basics
- Dashboard Widget
- Coordinate System
- The first Filter
- Important Classes
- CIContext
- CIImage
- CIFilter
- Creating a Filter
- Filter-Chains and Generators
- Face Detection
- Important Classes
- CIDetector
- CIFaceFeature
- Detecting faces in an image
- Summary
- Additional Features
- Face Detection in Videos
- Further Reading
- References
What is Core Image?
Core Image is an image processing framework, first introduced to mobile devices in iOS 5. Core Image enables you to create advanced filter effects, as you may now from Photoshop or Instagram. In iOS 7, 115 filters are currently available. Apart from image manipulation and enhancement capabilities, Core Image also supports face detection (not face recognition).
The Framework is used in Applications like Aperture, the iPhone Photos app, the Camera app (you can select filters on the bottom right, auto-enhance images and focus on faces) as well as graphic-heavy applications like Motion, which is lets you add animations and effects to 2d as well as 3d videos.
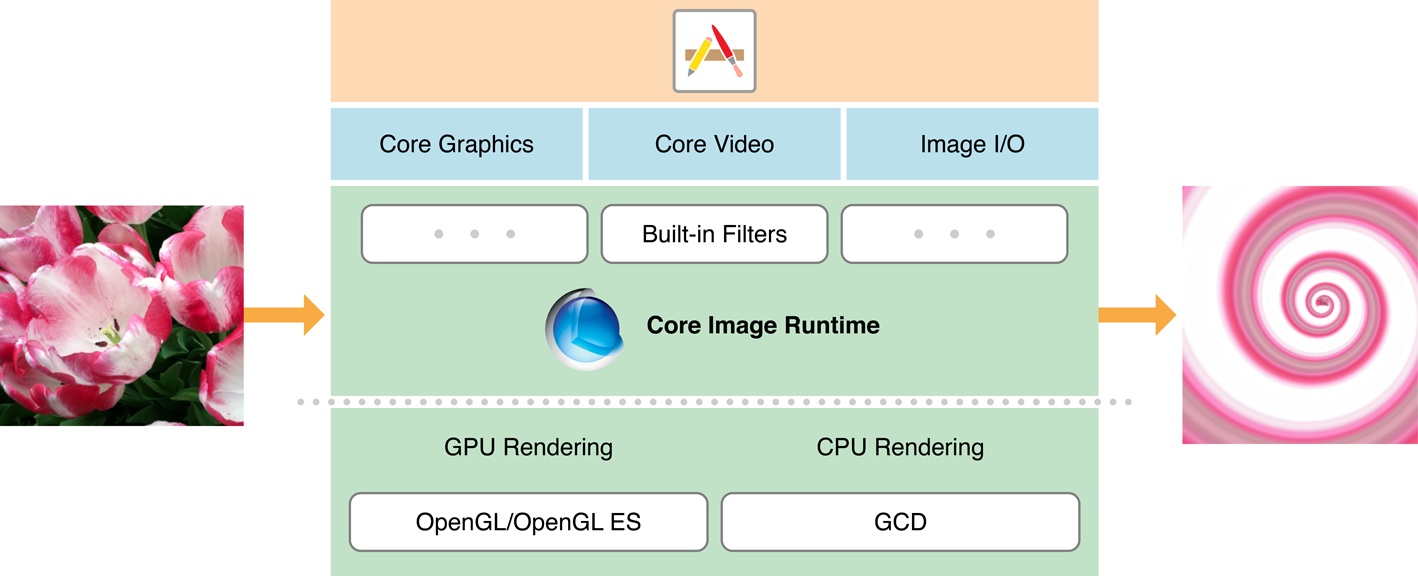
Basics
The Core Image Runtime can receive input from the Core Graphics, Core Video or Image I/O Framework. It performs per pixel operations on the images. For rendering, the CPU as well as the GPU (default) is used. To create more complex effects, chains of filters can be used, which will gather the image-manipulation-algorithms of each filter applied and render the resulting image just once. Due to eliminating
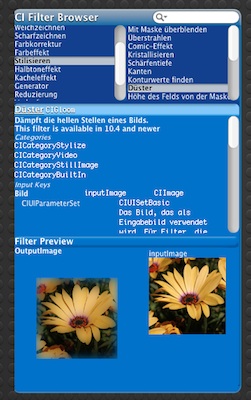
Dashboard widget
Due to the large number of filters, some „Helper“ can be quite handy, as the dashboard widget „CI Filter Browser“.
You can see a preview of the filters, grouped into their categories as well as their input-parameters.
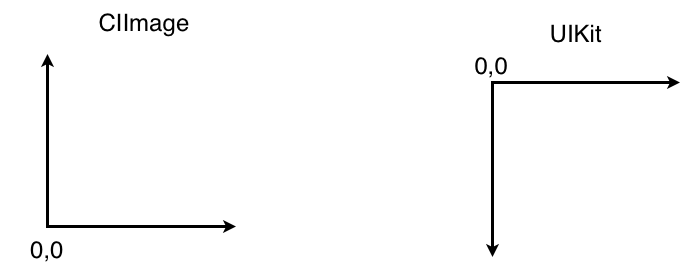
Coordinate system
Core Image uses the default cartesian system, meaning the Y-Axis is inverted in relation to the UIKit coordinate system. You should keep that in mind if you change the values on a filter or want to use CIFaceFeature-Coordinates for UIKit elements.
The First Filter
Important classes
These are the basic classes you need for filtering an image:
CIImage
The CIImage is an immutable representation of your image-data. Aside from representing the image, it stores all filter-algorithms applied to the image, but no actual rendering is done.
CIFilter
The CIFilter is a filter for a CIImage. It receives a image as the inputImage. When you access the outputImage property, the filter-algorithm is attached to the CIImage, but not calculated yet.
CIContext
The CIContext „draws the image“, more correctly: It renders the CIImage to another context. When a CIImage is passed to the CIContext, the context merges all attached filter-algorithms, optimizes and renders them at once.
The CIContext object is very expensive to create, so don't throw it away. As with painting-tools, you don't throw them away after paining an image.
Let's see that in action:
Creating a filter
Download firstfilter.zip and extract it.
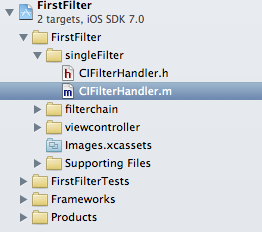
Go to the FirstFilter folder and open:
Now open CIFilterHandler.m
We want to achieve this effect:
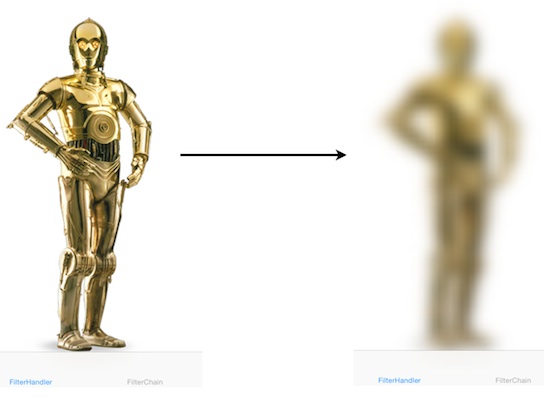
Let‘s start with setting up our image and filter:
TODOS:
- Create a default CIContext and name it „context“
- HINT: the CIContext-Class has the method
+ (CIContext *)contextWithOptions:(NSDictionary *)dict; - Create a CIImage from the image-parameter and name it ciImage
- HINT: the CIImage-Class has the method
- (id)initWithImage:(UIImage *)image; - Create a Blur-Filter, it‘s name is „CIGaussianBlur“
- HINT: the CIFilter has the method
+ (CIFilter *) filterWithName:(NSString *) name; - Set the ciImage as the inputImage of the blur-filter
- HINT: the CIFilter has the method
- (void)setValue:(id)value forKey:(NSString *)key; - HINT: the right key is one of these:
kCIInputRadiusKey
kCIInputImageKey
kCIOutputImageKey
kCIInputIntensityKey
Solution:
|
|
CIContext * context = [CIContextcontextWithOptions:nil]; CIImage * ciImage = [[CIImagealloc] initWithImage:image];
CIFilter * blurFilter = [blurFilter setValue:ciImage forKey:kCIInputImageKey];
|
|
With our filters set-up, we are now ready to render the image:
TODOS:
- Create a CGImageRef with our context
- HINT: the CIContext-Class has this method
- (CGImageRef)createCGImage:(CIImage *)im
fromRect:(CGRect)r; - HINT: you want to draw the filtered image, not our original ciImage
@property (readonly, nonatomic) CIImage *outputImage; - HINT: our outputImage knows it‘s own size
- (CGRect)extent; - Create a UIImage from our CGImageRef from TODO 5 and return it
- HINT: the UIImage-Class has the method
+ (UIImage *)imageWithCGImage:(CGImageRef)cgImage;
Solution:
|
|
CGImageRef ref = [context createCGImage:blurFilter.outputImage fromRect:[blurFilter.outputImageextent]];
|
|
Which produces the filtered image! If you don't see any image, something went wrong. Check your filtername again and if you used the right inputKey for the inputImage!
Filter-Chains and Generators
Chaining filters for advanced effects
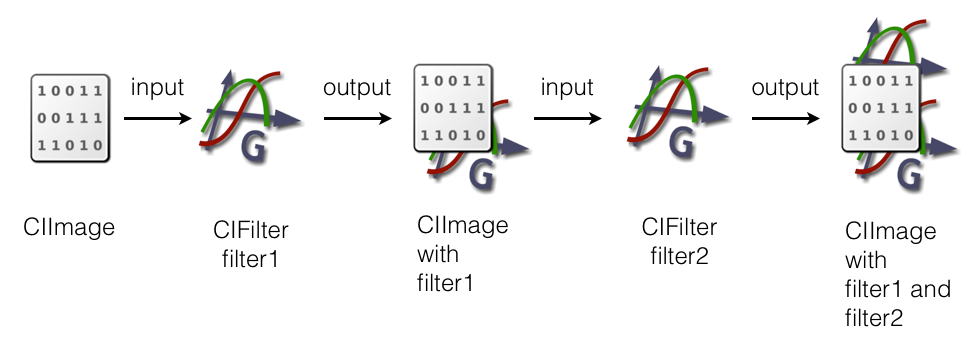
To create more sophisticated effects, one filter is just not enough. Luckily filters can be chained together to create new effects. You can use the outputImage of a filter as the inputImage for the next filter. As you do so, every filter attaches it's algorithm to the CIImage passed around.
Generators
Chaining is often used in combination with Generator-Filters. A Generator-Filter creates an CIImage from "nothing" (they get no inputImage). You can use one if you need a texture on the fly or need random input. Here are some examples of generators in action:
| CIRandomGenerator | CIStripesGenerator |
CIConstantColorGenerator |
 |
 |
 |
Beware
Generators (as well as a few normal filters) produce infinitely large images. As a result, -(CGRect)extent returns (0,0,0,0), so you have to specify a rect by hand for the CIContext to render. You can use:
CGRectMake(CGFloat x, CGFloat y, CGFloat width, CGFloat height)
to specify a custom rect for the context.
Let‘s try to build this:
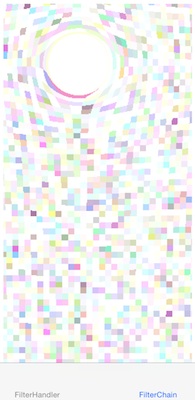
Stay in FirstFilter.m and open the CIFilterChain.m: 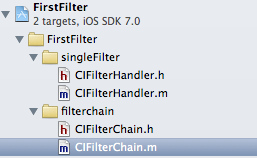
TODOS:
- Create a „CIRandomGenerator“ filter and name it „randomFilter“
- Create a „CIPixellate“ filter and name it „pixelFilter“
- Set the outputImage of the randomFilter as the inputImage of the pixelFilter
- HINT: You will need:
@property (readonly, nonatomic) CIImage *outputImage;
- (void)setValue:(id)value forKey:(NSString *)key;
kCIInputImageKey - Create a „CIHoleDistortion“ filter and name it „distortionFilter“
- Set the outputImage of the pixelFilter as the inputImage of the distortionFilter
Solution:
|
|
CIFilter * randomFilter = [CIFilterfilterWithName:@"CIRandomGenerator"]; CIFilter * pixelFilter = [CIFilterfilterWithName:@"CIPixellate"]; [pixelFilter setValue:randomFilter.outputImage forKey:kCIInputImageKey];
CIFilter * distortionFilter = [CIFilterfilterWithName:@"CIHoleDistortion"];
[distortionFilter setValue:pixelFilter.outputImage forKey:kCIInputImageKey];
|
|
We set-up our three filters, let's try to tweak the distortion-filter!
TODO:
- Change the radius of the distortionFilter to 40
- HINT: The value has to be a NSNumber
- HINT: The key starts with kCIInput...
- Change the center of the distortionFilter to (x = 100, y = 400)
- HINT: Use an CIVector for the value
[CIVectorvectorWithX: Y:]
HINT: The key start with kCIInput... (remember you want to set the center) - Render the outputImage of the distortionFilter to a CGImageRef
- HINT: use
- (CGImageRef)createCGImage:(CIImage *)im fromRect:(CGRect)r; - HINT: remember,-(CGRect)extent does not work, so we have to create a CGRect
- HINT: Use 0 for x and y, the width and height of the image-parameter as width and height
- Create a new UIImage from the CGImageRef and return it
- HINT: use
+ (UIImage *)imageWithCGImage:(CGImageRef)cgImage;
Solution:
|
|
[distortionFilter setValue:@40 forKey:kCIInputRadiusKey]; [distortionFilter setValue:[CIVectorvectorWithX:100 Y:400] forKey:kCIInputCenterKey]; CIImage * outImage = distortionFilter.outputImage;
CGImageRef ref = [context createCGImage:outImage fromRect: CGRectMake(0, 0, image.size.width, image.size.height)]; return [UIImageimageWithCGImage:ref];
|
You don‘t have to remember all the names of the filters! Look at the Dashboard Widget to figure out which filter you need and how you can tweak it.
In addition, have a look at the Core Image Filter Reference from Apple: http://tinyurl.com/o4j9cg4
The CIFilter-Class has it‘s own documentation built in as well, more on that further down.
Face-Detection
Core Image can also detect faces in images! You may have seen it in the camera-app, marking found faces with a rectangle to show you where the camera will focus.
Don't confuse face detection with face recognition. Face recognition is a huge research area and not (yet? Maybe in future releases!) available in the iOS framework.
Important classes
CIDetector
The CIDetector is used, as the name implies, for detecting faces in an image.
CIFaceFeature
The CIFaceFeature represents a face, found in the image. It stores the positions of the eyes, mouth and angle of the face.
Detecting faces in an image
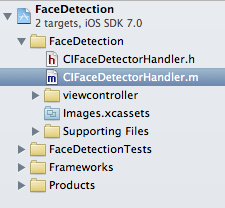
Download facedetection.zip and extract it.
Go to the FaceDetection folder and open

open the CIFaceDetectorHandler.m file:
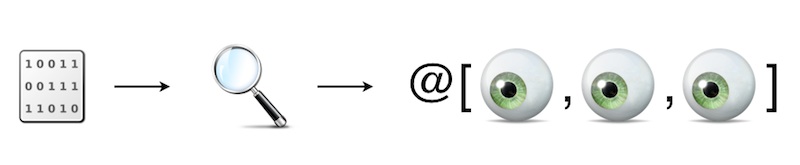
You can pass a CIImage to the CIDetector and it returns an NSArray of CIFaceFeatures, found in the image:
TODO:
- Create an NSDictionary and name it „detectorOptions“ with the key CIDetectorAccuracy set to CIDetectorAccuracyHigh
- Create a CIDetector of type CIDetectorTypeFace
- HINT: use
+ (CIDetector *)detectorOfType:(NSString*)type
context:(CIContext *)context
options:(NSDictionary *)options; - HINT: Only one type is available at the moment:
CIDetectorTypeFace - Get an array of CIFaceFeatures from the detector
- HINT: use
- (NSArray *)featuresInImage:(CIImage *)image;
Solution:
|
|
NSDictionary * detectorOptions = @{CIDetectorAccuracy:CIDetectorAccuracyHigh};
CIDetector * detector = [CIDetectordetectorOfType:CIDetectorTypeFace context:context
NSArray * foundFaces = [detector featuresInImage:coreImage];
|
|
Now that we found the face in the image, we want to mark it‘s position in the image:
TODO:
- Loop over the foundFaces and mark each face (there will be only one in this picture)
- HINT: the foundFaces contains CIFaceFeatures
- HINT: the position and dimensions of each face is stored in:
CGRect bounds; - use this method in the CIFaceDetectorHandler to mark the face:
- (void) addRectangleFromCGRect:(CGRect)rect
toView:(UIView *) view
withColor:(UIColor *) color; - Add a circle around each eye and the mouth
- HINT: use this helper-method
- (void) addCircleAroundPoint:(CGPoint) point
toView:(UIView *) view
withColor:(UIColor *) color
andWidth:(NSInteger) width - HINT: CIFaceFeature has the properties
@property (readonly, assign) CGPoint leftEyePosition;
@property (readonly, assign) CGPoint rightEyePosition;
@property (readonly, assign) CGPoint mouthPosition;
Solution:
|
|
for (CIFaceFeature * feature in foundFaces) { [selfaddRectangleFromCGRect:feature.bounds toView:view withColor:[UIColorredColor]];
[self addCircleAroundPoint:feature.leftEyePosition toView:view withColor:[UIColorgreenColor] andWidth:20]; [selfaddCircleAroundPoint:feature.rightEyePosition [selfaddCircleAroundPoint:feature.mouthPosition }
|
|
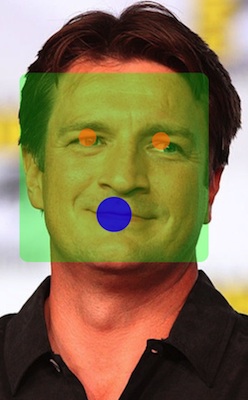
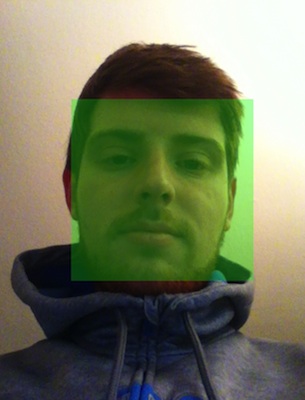
Now run it, you should see something like:
Summary
You should know now how to apply filters to images, chain filters for advanced effects and better performance and change filter input-values. You saw how to look for filters you don‘t know yet and finally, you learned how to detect faces in images.
An idea for another use of Core Images: You could simulate input based on a generated image by extracting the pixel-data!
Additional Features
Here are some cool features you might want to look at:
- Core Image can render animated transitions between two images: Look for the filters in the category: CICategoryTransition.
- Every filter has his documentation built in:
- log the result of [CIFilterfilterNamesInCategory: kCICategoryBuiltIn]; to get a list of all available filters on your device. (115 on iOS 7)
- If you already chose a filter you want to use, log [myFilter attributes] to get a dictionary of attributes you can set in the filter.
- CIDetector can check images for closed eyes, the rotation of the face and even if the face is smiling.
Face Detection in Video
Give the Project „VideoFaceDetection“ a try, it‘s a strip-down of this tutorial. (You will ned a device with a front-facing camera, e.g. an iPhone)
You can download it here: faceDetectionInVideo.zip
The solutions to the tutorials can be found here:
Further Reading
Here are some links with deeper coverage and additional ideas:
- Transitions between two images:
http://www.raywenderlich.com/5689/beginning-core-image-in-ios-5
- Filter video-input and detect faces on the camera:
http://www.icapps.be/face-detection-with-core-image-on-live-video/ - WWDC 2013 and 2011 have sessions on Core Image
https://developer.apple.com/videos/wwdc/2011/
https://developer.apple.com/wwdc/videos/
References:
Core Image Programming Guide
Core Image Filter Reference